

I am one of the guys who can’t sit on the couch and watch
soaps or “Home Improvement, Fixer Upper, Renovation Nation, or This Old House”
all day long while being retired. During my “Earning The Bacon” days before I
retired, I tinkered all day long with technical things. To stay happy now, I
need technical challenges to do and not baking with “Martha”.
Building our “Diesel Duck” trawler kept me on my toes after
retirement and then later cruising with the Duck for 8 years was even more
excitement. When the Duck was sold and I had the opportunity to customize our
house it turned into fun as well. We are not finished with it, or will we ever
be? It is work in progress. Marlene loves garden work during the spring and
summer season and doesn’t mind being on her knees plucking out dandelions for
hours. Ha! For the winter season we opted to follow our adventurous lust and
bought a travel trailer to tow it behind the truck to southern distant horizons.
Come springtime we are back and what could I do during theses summer and fall months?
I am not a garden buff, but I would love to do something
technical. I do the woodcutting and sanding in the garage, but the sawdust and
technical work hate each other, they don’t work together. How would you like a
circuit board, some fancy electronic components or mechanical apparatus covered
with saw dust which make you sneeze on top of it?
So, here we are, we don’t have a basement or extra room for
a neat little shop. I thought the salvation for me is a shed – a man cave, a
place where I could hide all my tools, oilcans and icky stuff. A grandiose
place for a workbench, drill press, vise and grinder. A place for an adjustable
power supply, meters and soldering station, a place for a small metal lathe and
bench-top milling machine. Don’t forget a TV! My brave girl said, “Go for it!”
It did cross my mind to build the shed myself. Here in
Windsor Essex County, the local bylaws permit only 108 square foot maximum
footprint for a detached accessory structure, which contains no plumbing (shed)
constructed without a building permit. You want to go bigger, an elaborate
space, using a Segway to get from workbench to drill press! This means you need
a building permit and for the hope to get it, you have to submit drawings, pay
a security deposit and a bunch of other fees. “Ha”, you have to fight with the
Conservation Authority here along Lake Erie seashore. In case you were lucky to
wiggle a building permit out of them, then you go ahead construct the structure
and entertain the Building Inspector and the Electrical Safety Authority
Inspector during inspections, don’t forget everything has to be done to code.
“Done that, got the T-shirt,” is the saying.
What, only 108 sq. ft.! Yep, 108 sq. ft. is not much. I am a
tidy guy, a small clean shop will do just fine with me. It is not a business
solution, it is a man cave. I been wondering how large a cell at “Sing Sing”
would be.
The conclusion was, stick with the the bylaws and to get it
done fast, buy an Amish shed, 9ft x 12ft (108 sq. ft.), with the exterior
finished to compliment our house, with double glazed windows and a metal clad
insulated 36” wide exterior door. The whole package including delivery ended up
cheaper than building it myself.


The inside finishing was left to the buyer. No sweat! I
looked forward to do the job and customizing the interior to my needs.
Marlene and I took a trip along Hwy 3 from Wheatley to
Aylmer, Ontario and looked at Wagler Mini Barns. Yeah, they had the right shed,
7 ft high walls, shingle and vinyl siding matching our house and garage, 6
weeks delivery. Done deal.


The company stuck to the 6 weeks delivery and was right on
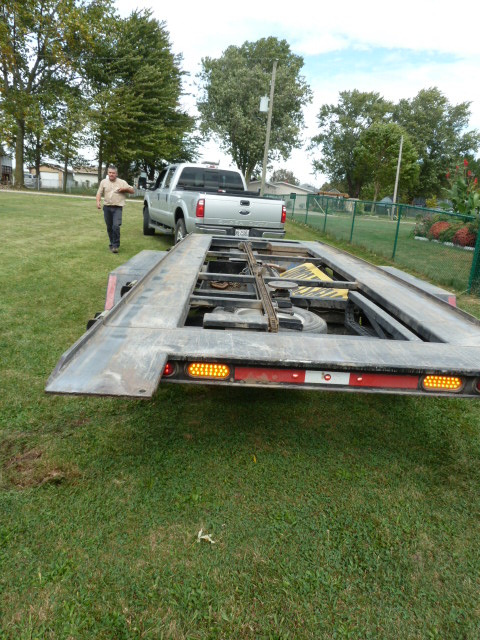
time, no excuses. We are dealing here with Mennonites. The shed was delivered
on a special trailer with all kinds of nifty hydraulics, that could move the
trailer bed sideways, turn the bed to any angle and extend it back to place the
shed properly onto the from us prepared and leveled gravel pad. No scratches on
the shed.


This spring I buried a PVC conduit for electrical cable in
the ground from the house to the shed site. My first job was after bolting the
shed down to run a # 10 cable and a TV antenna cable into the shed. I hooked
the power cable up to a new sub panel, fitted a 20 Amp breaker for a temporary
120 V outlet to have power for the cutoff saw and a “ghetto-blaster”.
From Lowes in Windsor I picked up a dozen or so 2x4 studs
for ceiling beams and two extra 2x6 studs to manufacture a sturdy ceiling beam
to hang a hoist. I stiffened up that beam with four additional wall studs
sandwiched to existing wall studs. That beam I secured with Simpsons strong
ties. This beam could carry 1300 Ibs. in the center. I am able to hoist a ½ ton
heavy piece of machinery, for example: I could hoist the future bench top mill
onto a heavy-duty tool cabinet. “Bravo!”


After I had wired up the shed with plenty of power outlets, switches
for 3 LED 48” light fixtures and a power provision for a wall heater, Marlene
got to work and insulated the walls with Owens Corning R15 pink insulation.


Finishing up the interior ceiling covering and wall paneling
took some sweat time, especially the window casing/trim and the door trim and then for
Marlene to paint it. I covered the floor with commercial vinyl tiles and
Marlene sealed them up. To finish the shed construction we rented from our
famous Home Hardware store here in Wheatley the AttiCat to blow in Owens
Corning loose fill insulation between ceiling and roof.


This is a messy job but the reward is that we have a nice
winterized shed. Here is the link to a youtube clip about AttiCat insulation!
Please look at all the pictures with explanation below.

A view from the entrance door

A view from the rear wall toward the entrance

The workbench was purchased from Costco, note the 5" Record Vise


This compressor is extremely quiet, 60 - 70 decibels


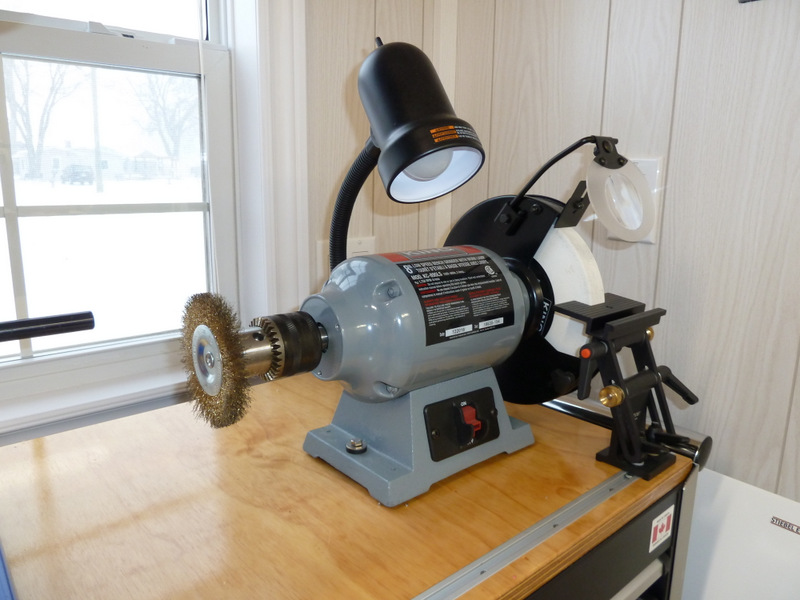
Slow speed grinder with 120 grit stone on one side and 1/2" drill chuck on the other side to accept wire brush or any tool for grinding or polishing. I use the grinder mainly for sharpening Lathe or Mill cutting tools. The tool rest is a Veritas #05M23.01 unit from Lee Valley Tools.

This 12 peed bench drill press has a modified quill and is very precise.


The Grizzly G0768 metal Lathe fitted with an Ikea lamp

I'd love to have a bench top milling machine and hope it will rest on top of this lovely tool cabinet soon ;-)
I might add a shelf or two to the walls. A picture here or there, maybe a shop stool as well. Hopefully you all like this shop.
Benno
Nice shop, er, man cave, Benno. My husband will get much more out of today's post than I but I wanted to say great job!
ReplyDeleteVery well thought out, all Weather and nicely organized without taking too much space. I like the way you kept everything on wheels in case you need to rearrange things for any project.
ReplyDeleteTwo Thumbs Up Benno.
Be Safe and Enjoy!
It's about time.
Thank you for your nice comments, Benno
ReplyDeleteThe cabinet you have the Grizzley G0768 on, where did you get that?
ReplyDeleteRaymond just noted your comment therefore the late reply.
DeleteThe cabinet is a Mastercraft Base Workbench. Just copy the link and paste to your browser.
http://www.canadiantire.ca/en/pdp/mastercraft-base-workbench-0681224p.html#spc