On previous journeys there were times we wished we had a rearview camera on our travel trailers and we said we should get one. Last week we did and of course Benno was enthusiastic to install it on our Grand Design, Imagine travel trailer. While he did that we experienced probably the hottest days here in Ontario this summer. Thank goodness for air-conditioning!
Our trailer came “preprep” for a Furrion rearview camera with a bracket mounted outside on the top rear wall just below a marker light. We had decided to purchase a Haloview MC7108 7” 720P HD Digital Wireless Backup Camera System, with a 7” LCD Reversing Monitor and a IP69K waterproof rearview camera built in DVR kit instead of the Furrion Camera System. The Haloview Camera was a pile of money less. From reviews on YouTube we learned the Haloview has a SD card (SD stands for Secure Digital) for movie storage and playback. Like the Furrion Camera it came with a 7inch monitor of extreme quality. On the dollar and cents subject the 7-inch Furrion is here in Canadian $967 incl. taxes and the equivalent Haloview system comes to $377 CDN incl. taxes at Amazon Canada. Quite a stiff difference of 500 dollars, hard to swallow.
To make the installation of a rearview camera simple, the manufacturer decided to preprep the Furrion camera power supply into the exterior light system, meaning that in order for the camera to operate we would have to turn on the headlights in our truck because the camera power supply wire is wired to the trailer marker lights (isn’t that stupid). If we were traveling at night (which we try to avoid) it would make sense. However having the headlights on while pulling the travel trailer during the daylight didn’t appeal to us, so Benno rewired the travel trailer’s rearview camera so that the camera gets its power supply from the trailer’s 12V battery bank. The battery is being charged anyway while we are driving by the tow vehicle.
There is not much room between the headliner and the roof to fish or pull new cables. By opening up the ceiling liner in the bathroom with a 2½-inch hole saw very close to the outside position of the camera, Benno managed to have access to the cables. Into the cover plate of the hole he decided to install a neat little switch with a LED light to be able to switch the camera on and off. The LED light indicates when the camera would be on. It is easy to notice so we won’t forget to turn the camera off when we are parked.
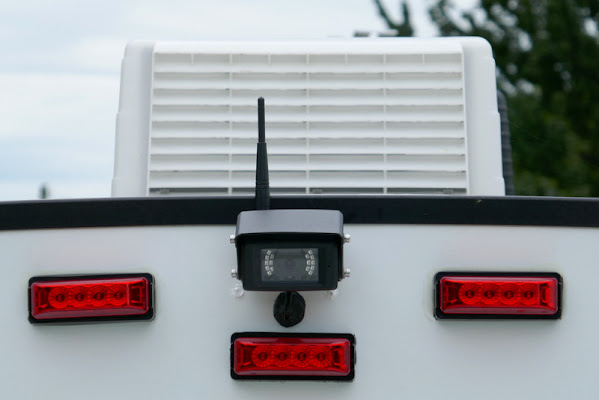
When it came to the installation of the camera on the outside of the top rear wall, we discovered that the pre installed Furrion mounting bracket already had cracked screw holes. I guess the guys at the factory working with power drivers don’t always know when to stop or set the torque right. Anyway, we didn’t need that bracket as it turned out. Also Benno moved the middle one of the three marker lights a little further down so the camera sits above it and its antenna sticks above the roofline for a better signal transmission rather than underneath it. Actually the marker light housing lucky wise covered the mounting and wire holes of the old camera position nicely.
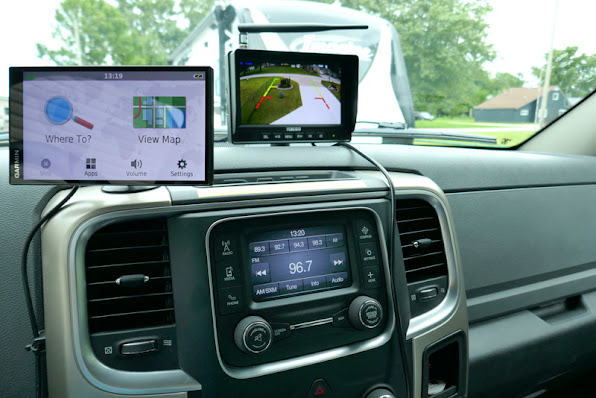
The 7” monitor comes with two different brackets for mounting in the truck. We used the circular one as it afforded us to angle it for optimal viewing. The 12V power supply for the monitor comes from the plug in the Cigarette lighter
I like to point out YouTube has a fair amount of rear camera installation movies on hand, which can be a fantastic help to any one who is planning to install a Furrion or Haloview rear camera system on his Travel Trailer, Fifth Wheel or motorhome.
What did I do in the meantime? Looking after the lawn in the blazing heat ;-)
Thanks for dropping by again and I hope everyone was able to stay cool and enjoyed our Canadian summer.


